
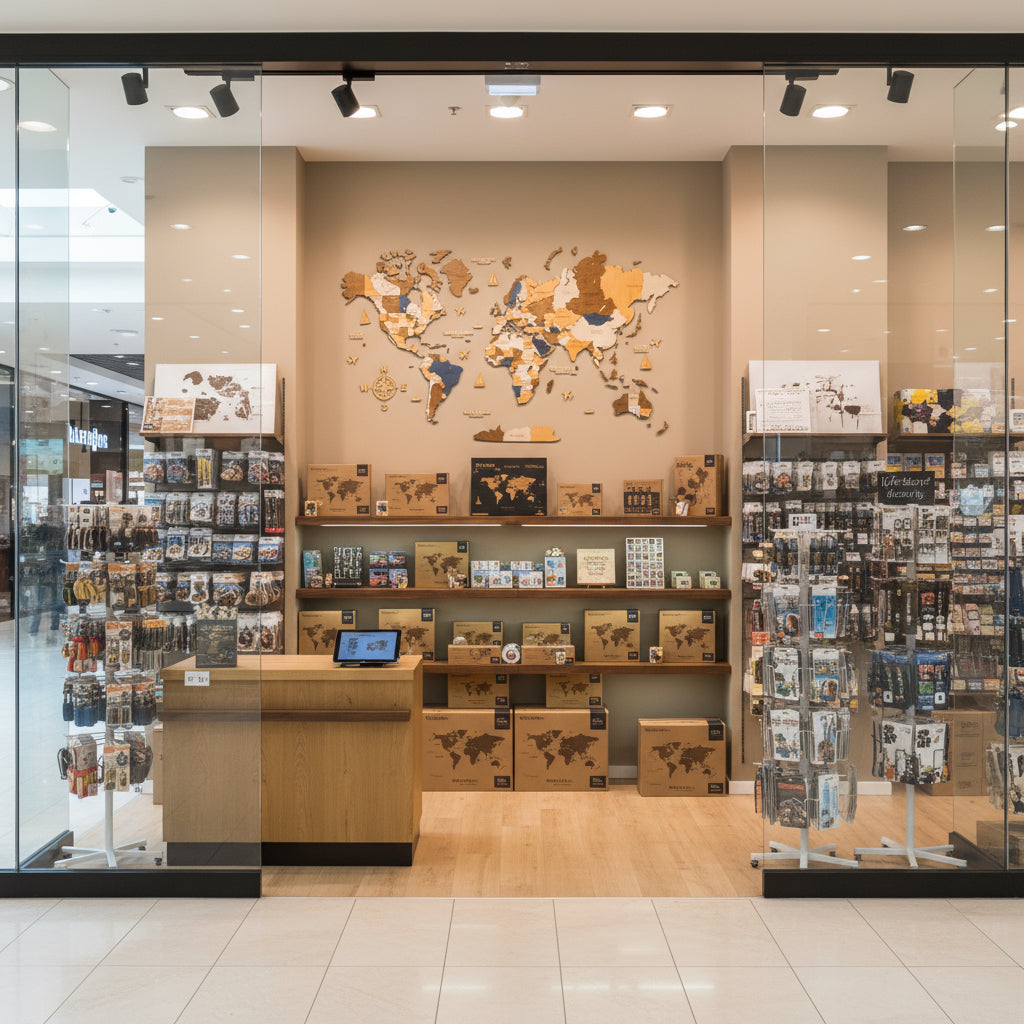
For interior designers, architects, and hospitality professionals, a wooden world map is more than decor – it’s a versatile design element. In this piece, we’ll explore how these maps can be seamlessly integrated into design projects, from chic hotel lobbies to cozy café corners and corporate offices. We address the key considerations designers have: finishes and color options to match palettes, sizing and viewing distance guidelines, mounting solutions for delicate walls, and the technical resources available (like CAD drawings, 3D models, and spec sheets). Whether you’re designing a travel-themed hostel lounge or a global enterprise’s boardroom, learn how to spec a wooden map that fits your aesthetic and practical needs.
Aesthetics and Finishes (Wood color, Dark brown, Multicolor)
Wooden world maps come in a variety of finishes that can complement different design styles. The common finishes often include:
• Wood color: This finish showcases light, raw wood tones (think beech or natural birch color). It’s perfect for Scandinavian or minimalist interiors where you want a warm but subtle wall piece. The natural finish lets the grain and texture show, adding an organic element.
• Dark brown (classic look): A popular choice, this medium-to-dark brown tone offers rich depth. It gives a luxurious, classic feel – great for executive offices, libraries, or any space with traditional wood furniture. Dark brown pairs nicely with neutral walls, creating contrast without being too dark.
• Multicolor or Themed Palettes: Some designers opt for maps that have a mix of colors – for example, a vintage-style patina with different continents in different muted tones, or a vibrant mix for a playful look. These can tie into a room’s accent colors or thematic schemes (e.g., a world-travel themed café might use a multicolor map with each continent a different hue).
When selecting a finish, consider the overall mood of the space. Wood color maps emphasize warmth and creativity (imagine an open co-working space with lots of plants – a wood color map fits right in). Dark brown finishes convey seriousness and elegance (think boutique hotel lobby with leather chairs and walnut reception desk – a dark brown map above the concierge is a match). Also consider lighting: darker finishes need good lighting to highlight the map’s details, whereas lighter finishes can rely on ambient light.
Another aesthetic aspect is whether the map includes extra elements: many come with small plane or ship cutouts, or labels for oceans. These can be included or left off depending on how minimalistic you want to be. For instance, a clean corporate installation might omit whimsical plane shapes, whereas a kid-friendly space might embrace them.
In summary, the finish you choose should echo other finishes in the room (match wood tones or contrast intentionally) and support the story of the interior. With options from wood color to deep dark brown, designers have flexibility to treat the map either as a subtle texture on the wall or a bold focal art piece.
Sizing and Viewing Distance Guidelines
Selecting the right size map (typically M, L, or XL) depends on the wall dimensions and typical viewing distance in the space. Here are some guidelines:
• M (Medium) Size (~120 cm wide): Good for small walls, alcoves, or as part of a gallery wall composition. Viewing distance for an M map might be relatively close, say 1-3 meters, which is often fine for residential use (home office, bedroom) or tight spaces. In a commercial setting, an M could work behind a reception desk if space is limited, but generally it’s on the smaller side for larger rooms.
• L (Large) Size (~160 cm wide): This is the most versatile. It’s substantial enough to fill a wall above a sofa or credenza, and detail is visible from moderate distances (3-5 meters easily). In an office or restaurant, L hits the sweet spot where people across the room can still see the continents’ shapes clearly, yet it’s not overwhelming the wall. If unsure, many designers default to L as a safe choice.
• XL (Extra Large) Size (~210+ cm wide): This is a true statement piece, spanning around 2+ meters. Ideal for spacious areas like hotel lobbies, conference rooms, or long corridors where people view it from a distance (5-10 meters). The XL really shines when you have a big blank wall and want to create a destination point – for instance, a feature wall in a meeting room where clients immediately notice it. One should ensure there’s enough blank wall around it so it doesn’t feel cramped. Also, if the ceiling is low, check the height – XL maps can be about 1.1 meters tall, so they need wall height (ceilings of 2.5m or more work, but you’d mount it a bit lower).
Viewing distance matters because of legibility. These maps often have small cutout country names or capital names (depending on the version). On an XL, text and details are larger, so someone standing 5 meters away at a hotel lobby can still read country names. On an M, those might be tiny. If the text detail is critical for your use (like an educational display in a library), you may prefer L or XL even if wall space is tight, just so students can read it from a few steps back.
Also consider wall context: If mounting above furniture, measure the space. You generally want some clearance around the map – it shouldn’t exceed, say, 70-80% of the furniture piece’s width below it for balance. For example, above a 2m long couch, an L map (1.6m) is perfect. An XL (2.1m) would overshoot the couch width slightly, which could still work if deliberately going for oversized look, but usually you’d center it and have ends going beyond the couch – a bold choice.
One more tip: consider human scale and interaction. In a public space, people might walk up to the map and point things out. An XL invites that – multiple people can gather around and interact without crowding. At smaller sizes, it’s more for visual enjoyment from afar with occasional up-close study.
In summary, size choice is a balance of wall dimensions, viewing distance, and how much emphasis you want. Always check the exact measurements and perhaps tape out the map’s outline on the wall to visualize (designers often do this with painter’s tape) before committing, to ensure perfect scale.
Mounting, Unmounting, and Delicate Walls
Designers often worry about installing decor on precious wall finishes (think veneered panels, wallpaper, or historic surfaces). The wooden maps fortunately use a non-destructive mounting method: usually double-sided adhesive pads. This is a blessing for delicate walls – no drilling means no holes, which is great in rentals or preserved interiors. Here’s how to handle mounting in various scenarios:
• Standard Painted Drywall/Plaster: The adhesive works well here. It’s strong enough to hold each piece (since the pieces are lightweight wood). If the map comes with a paper template, you tape that to the wall to guide placement. Then you peel-and-stick each piece accordingly. For removal, as mentioned, warming the adhesive (hairdryer) and gently prying usually does the trick without peeling paint – though extremely fresh paint or very old brittle paint could be riskier, so ideally mount on a well-prepped surface.
• Wallpaper or Delicate Surface: Here, you should be cautious. Sticking adhesive on wallpaper might rip the paper upon removal. If the client insists on placing it on wallpaper, you have a couple of options: one is to use a different adhesive, like those 3M Command strips that are designed to be removable (test one behind a door or hidden spot first). Another approach: mount the map on a backing board or panel which then is hung on the wall using traditional hooks. For instance, get a large acrylic or thin MDF board, adhere the map to that board, and then hang the board (like a picture frame). This way, only a couple of picture hook points touch the wall. The downside is a slight visible board or frame, but it can be quite sleek if done well (clear acrylic or painted board matching the wall color).
• Glass or Tiled Wall: Sometimes lobbies have marble or glass walls where you absolutely cannot damage or mark them. Adhesive might stick too permanently on glass (or not at all on rough stone). In such cases, the panel method above works, or using suction-based hooks for glass (though for something as large as an XL map, suction hooks might not be feasible for all pieces). Another tactic: use very thin wire mounts – attach small eyelets to a few inconspicuous map pieces and suspend them with nearly invisible fishing line from the ceiling or a top rail. This is advanced, but I’ve seen it done in exhibit installations where wall contact was forbidden.
• Temporary Installations: If you are designing a space that might change (like an event or rotating exhibit), you might want to reuse the map elsewhere. In that case, definitely use removable adhesives like Command strips instead of the ultra-sticky tapes that come with it. It may not hold as long over years, but for short term it’s fine and you can take the map off in one piece and reapply new strips at the next location.
Regarding mechanical mounting: If a client really wants a permanent fixture, you can mount pieces with tiny nails or screws (some pieces are large enough to discreetly drill through), but that’s rarely necessary. Also, mechanical fixes defeat the purpose of the seamless look the map offers by floating on the wall.
Dismantling and moving the map: If you ever have to, keep the original template or make a reference of where each piece goes. Removing piece by piece and storing flat is advisable. You can request extra adhesive pads from the supplier for reinstallation, or get similar double-sided tape from hardware stores.
In summary, the mounting is quite design-friendly – it’s one reason these maps are liked in HoReCa design, because they don’t require construction work. Just plan for any special surface considerations and communicate with the installation team about the method so they don’t improvise in a way that could harm the wall or the map.
Tech Sheets and 3D Packs (DWG/OBJ Files, Textures)
Professional designers and architects often need technical assets to include the map in their plans or client presentations. Fortunately, many wooden map manufacturers provide spec sheets and 3D models. What can you expect?
• Tech Sheet / Spec Sheet: This is usually a PDF that includes dimensions of each map size, weight, material (e.g., “laser-cut from 6mm Birch plywood”), mounting method description, and maybe a diagram. It’s useful for adding to your project’s submittal documentation or for checking things like fire code (wood wall decor is typically fine, but spec might note if it has any fire retardant coating or not). It will also list contents (number of pieces, etc.), so your installers know what to inventory.
• CAD Drawings (DWG/DXF): Some suppliers can give a 2D CAD outline of the map. This is great if you want to drop a scaled outline into your floorplan or elevation drawings. For instance, in AutoCAD or Revit, you can import the DWG and have an exact silhouette of the map on your wall elevation to show clients or coordinate with other elements (like ensuring it doesn’t conflict with lighting or signage).
• 3D Models (OBJ/FBX, etc.): For 3D renderings, you can often get a model of the map. This could be a textured OBJ or a SketchUp file, etc., with the map pieces as a 3D object. Using that, you can render it in your visualization software (3ds Max, SketchUp + V-Ray, etc.) to show exactly how the map will look in the designed space. The textures might also be provided – e.g., a wood grain texture that matches the actual finish. If not, you can use a similar wood texture from your library to approximate.
• Revit families or BIM data: Sometimes, if the supplier is advanced, they may have a Revit family or at least BIM info (like embodied carbon data if you care, or just the geometry for Revit). This is less common, but you could always make your own since a map isn’t too complex geometry for an experienced BIM modeler.
The 3D pack might also include different variants if finishes affect geometry (usually not, since it’s mostly texture difference). But if a certain size has more pieces (for example, an XL might have extra island pieces that an L doesn’t include), the model would reflect the correct configuration.
Having these technical files not only helps in planning but also in client communications. You can avoid surprises by showing exactly how big the map is relative to furniture in a rendering. If your client is a chain (hotel or restaurant) and you plan to replicate the feature in multiple locations, you can incorporate the model into your prototype design package.
To get these, usually you contact the supplier’s B2B or designer liaison. They might require an email request rather than a public download, to ensure it’s given to trade professionals.
All in all, using the provided tech resources will save you time and increase accuracy in your design documents. It’s a real advantage when suppliers support designers this way – it shows they’re keen on being specified in projects. Don’t hesitate to ask for what you need (dimensions, weights, model files), as it ultimately helps both sides: you design better, and they get represented correctly in your project.
Project Packages and Logistics for Designers
When incorporating a product like this into a project, beyond design considerations, you have procurement and logistics to consider. Many suppliers offer project packages for designers/architects, which might include:
• Trade Pricing: If you’re ordering on behalf of a client, you might get trade discounts. Reach out early to the supplier’s B2B rep to get a quote. For multiple units (say you’re outfitting a hotel chain with maps in each location), definitely negotiate a project rate.
• Showroom Samples: Designers often want to show a sample to a client or see it in person. Some companies will loan or sell a sample map (perhaps a smaller size or a corner piece set) at a discount. If you run a design showroom or materials library, they might provide a display piece.
• Custom Requests: Need a special color finish or perhaps a smaller-than-standard size? For a large project, manufacturers might accommodate that. E.g., maybe you want a “Medium-Large” somewhere between their M and L for a specific wall proportion – they could potentially cut a custom scale if the volume justifies it.
• Installation Support: While generally straightforward, for high-profile installs the supplier might offer to send an installer or detailed instructions specifically tailored to your project. For instance, if you’re mounting an XL map 20 feet high on a lobby wall, they could advise on scaffolding or sequencing (maybe mount it in sections). Some even have partnerships with installation services in major cities.
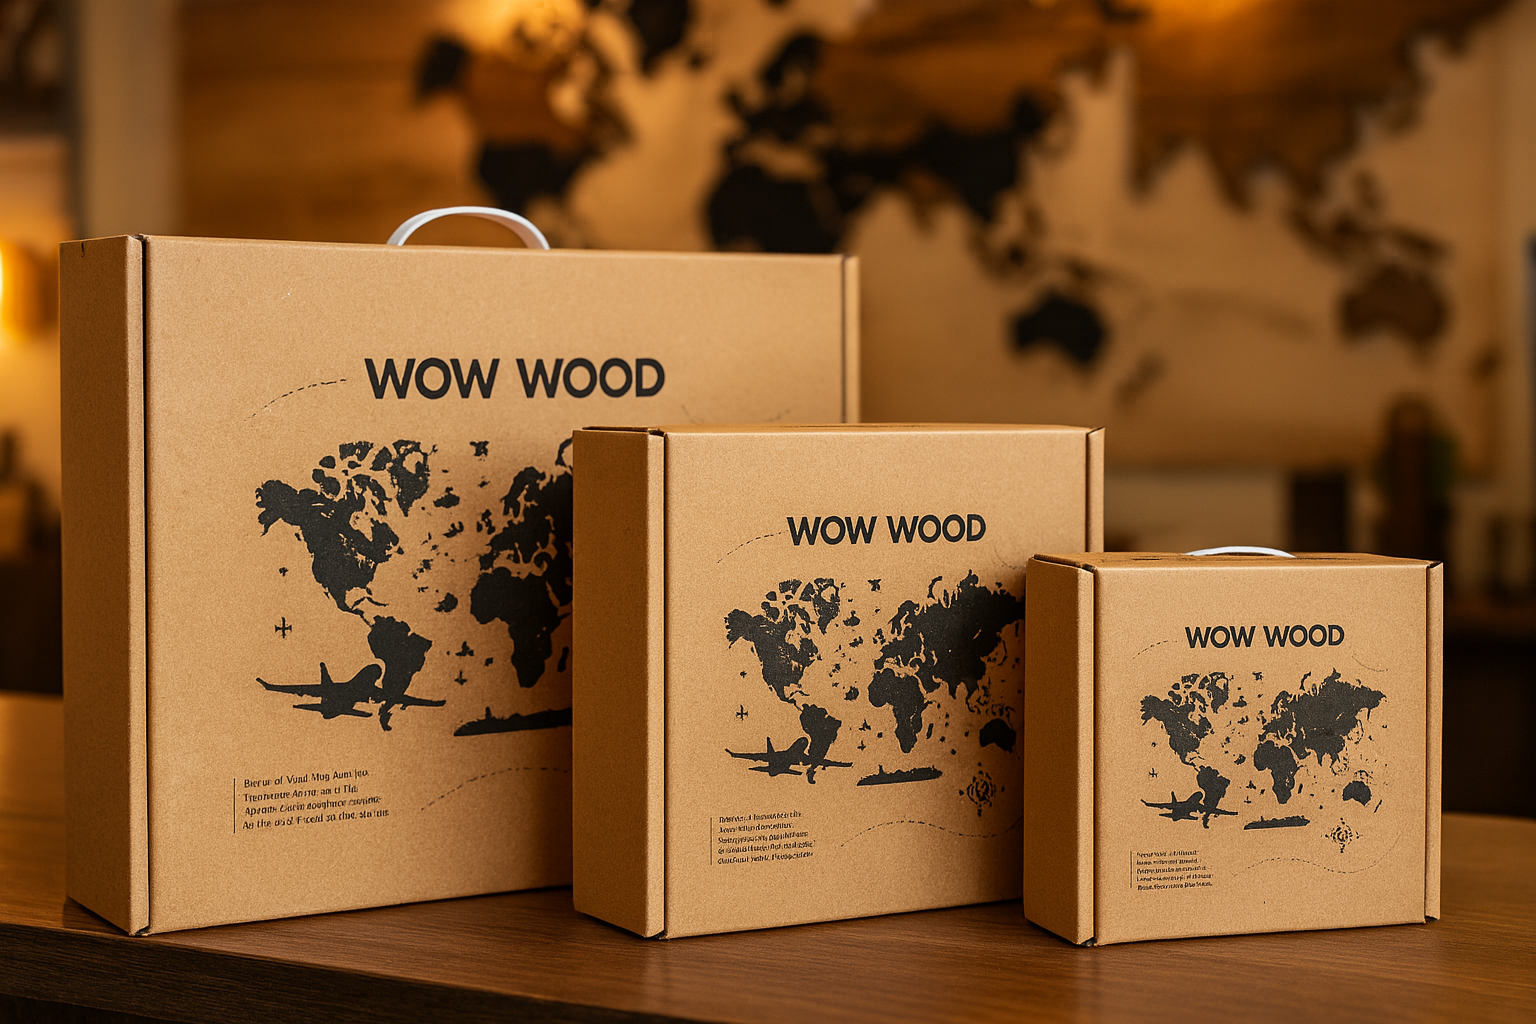
• Logistics Coordination: If your project involves multiple sites (like a franchise rollout), the supplier can often drop-ship each map directly to site, or to your warehouse. They’ll pack it securely (these maps usually come in a well-fitted box with protective foam). Check the box dimensions to plan handling – an XL will come in a pretty large flat box. For international projects, ensure they handle export documents and that wood products are cleared (some countries have restrictions on wood imports, but decorative finished goods are usually fine).
• Lead Time Management: Incorporate the manufacturing lead time into your project timeline. If your hotel grand opening is in June, and you need the map installed by May, and lead time is 4 weeks, you should order by March or earlier. It sounds obvious, but with many moving pieces in a project, a decor element lead time can slip if not noted. A good supplier will remind you, “Order by X date to guarantee delivery by Y date.”
• Aftercare: If down the line your client damages a piece (maybe someone pries off a piece out of curiosity and breaks it), can they get replacements? Most likely yes – individual pieces can be replaced. Having the supplier’s contact in your project manual or handing it to the facility manager can be helpful. Also, cleaning instructions should be passed on (generally just dusting).
For HoReCa (Hotel/Restaurant/Café) specifically, consider how the piece fits into operations. In a hotel, maybe the map is behind a concierge desk – ensure it’s sealed or high enough not to be touched by every guest (unless that’s intended). In a restaurant, if it’s in a dining area, consider if it might get greasy or smoky; maybe you’d request a special coating (like a clear matte sealant) for easier cleaning. Not common, but if the environment demands it, ask the supplier.
Finally, brag a little: these maps can be a signature piece in your project portfolio. Many designers photograph completed projects; a wooden world map on the wall is very photogenic. You might coordinate with the supplier to possibly feature the project on their site or social media, giving you a shout-out too – it’s a nice mutual promotion.
Need detailed specs or a quote for your design project? Request the design spec sheet & 3D models to seamlessly integrate WOW WOOD maps into your plans.
FAQ (Design & Hospitality Projects):
• Q: Can the map be made in a custom color or finish to match my project?
A: Yes, custom finishes are possible. If you provide a color sample or Pantone/RAL code, we can discuss staining or painting the wood to closely match it. Commonly, designers might request a whitewashed finish, a grey tone, or even a two-tone map (e.g., land in one color, water areas in another) to align with their scheme. There may be a minimum order or a small setup fee for custom finishes, and it could add a week or two to lead time, but we’re happy to accommodate special requests for unique projects.
• Q: How do I ensure the map will fit my wall perfectly?
A: We provide detailed dimensions for each size. Additionally, we can send you the outline template (in PDF or CAD format) for the map. Many designers will print the outline to scale or mark it with tape on the wall to double-check sizing. If your wall has specific constraints (like a column or a TV that the map needs to avoid), you can even send us a sketch and we’ll advise on the best size or layout (for example, maybe using parts of the map separately around an obstacle). In some cases, we can slightly adjust spacing of pieces to stretch or condense the map layout by a few percent to better fill a particular aspect ratio – feel free to ask.
• Q: Are there options for mounting on a curved wall or other tricky surfaces?
A: The map pieces themselves are flat, and generally work best on flat walls. On a gentle curve (like a very large radius curved wall), you could still mount them – the pieces are small enough that they’ll conform individually as long as the curve isn’t so tight that a single country spans significantly different angles. We’ve seen installations on curved lobby walls that look great. For extremely uneven surfaces (like textured concrete or brick), the adhesive might not bond well. In those cases, one approach is mounting on a substrate first (as mentioned in the article, an acrylic or wood panel) and then attaching that to the wall. Another approach some clients used: installing small stand-offs or magnets on the wall and backing the map pieces with metal – but that requires a custom DIY solution. We’re happy to consult on unusual surfaces; chances are, someone has done a similar install and we can share insights. Photographs of the wall and its texture will help us recommend the best method.
• Q: What is the lead time for a bulk order for a hotel project?
A: Lead time depends on quantity and customization. For a bulk order of standard maps (say 10 or more units), we generally ask for 3-4 weeks production time if they’re not in stock. If you need, for example, 50 maps for multiple hotels, we might schedule a longer production run, around 4-6 weeks. Shipping time is additional, based on destination. We can often fulfill smaller orders (1-3 units) within 1-2 weeks if it’s an urgent timeline, possibly using stock on hand. It’s best to contact us as early as possible with your project schedule – we can then reserve production slots to meet your install dates. And if your project is phased (different sites over a year), we can also plan a supply schedule so each phase gets its maps just in time.


Share: