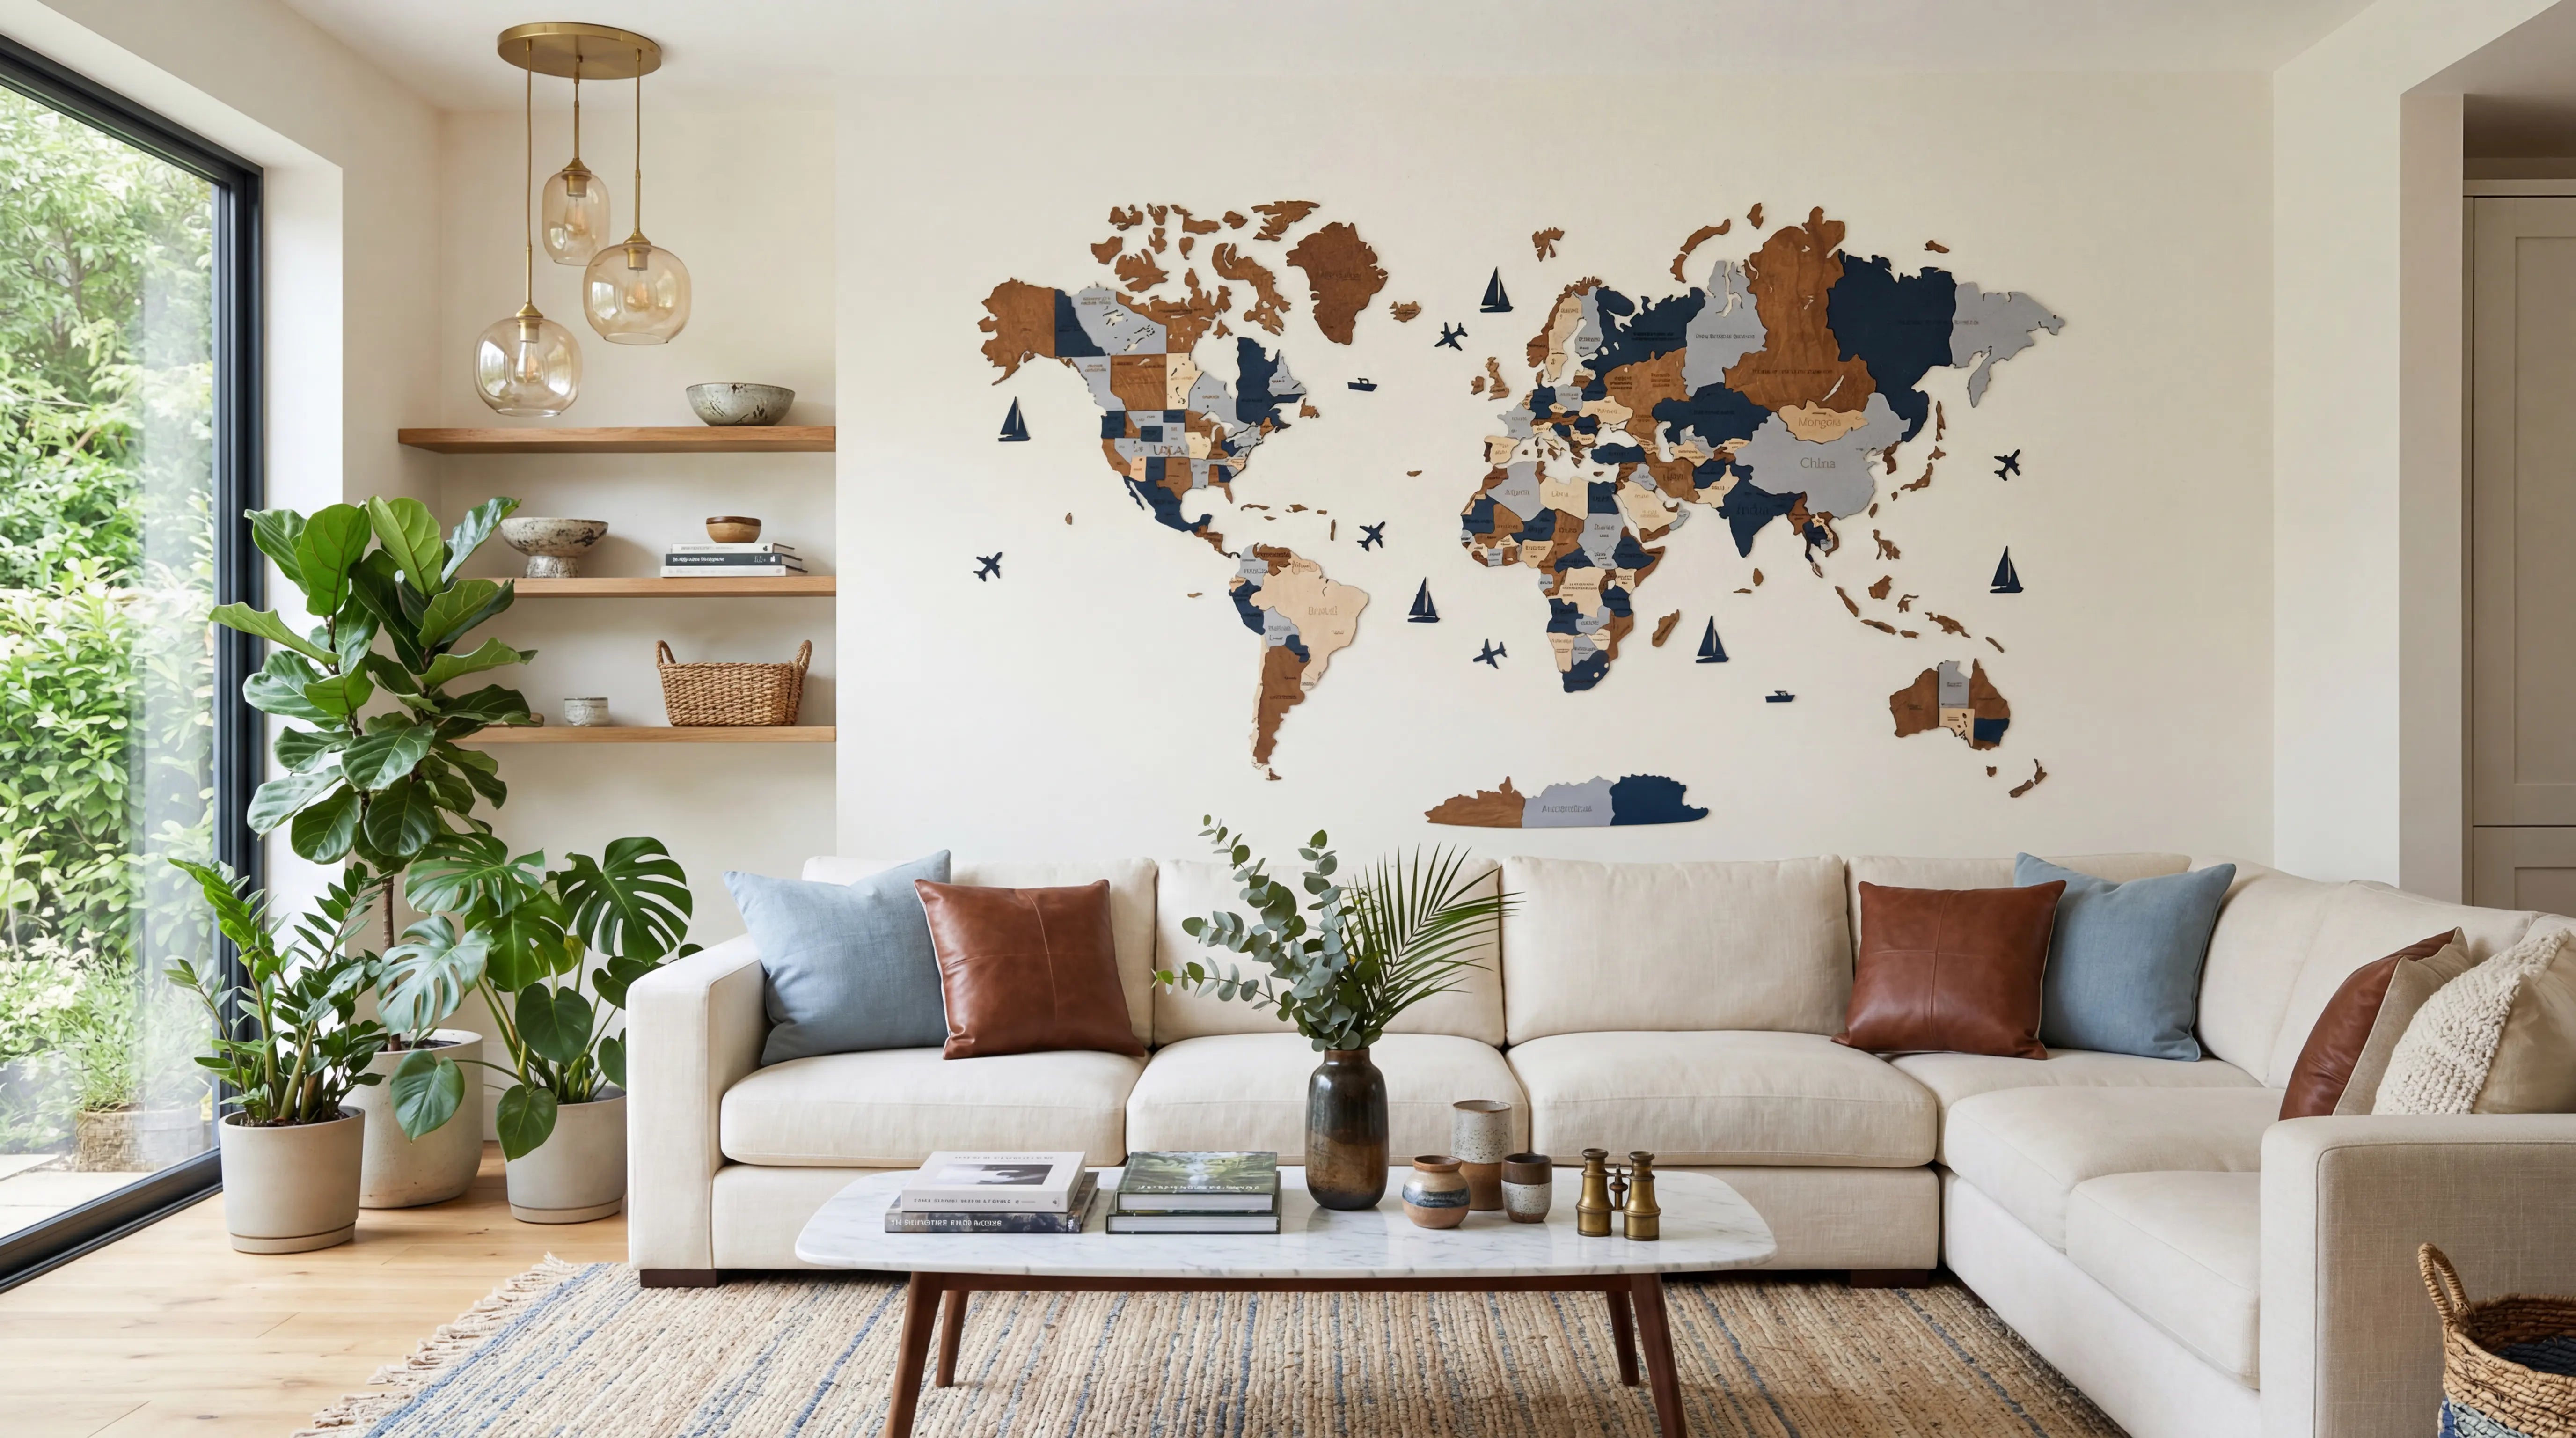
How to Mount Your WOW WOOD Map
No drill. No tools. ~90 minutes. Everything you need is in the box.
What's in the Box
- 50+ birch plywood map pieces — precision laser-cut continents, islands, and ocean labels
- 2 rectangular island panels — pre-arranged small islands, mount as single pieces
- Decorative elements — planes, ships, compass, ocean names
- 297 wooden pins with country flags — mark your travels after mounting
- Positioning templates — sized for each map variant, connect together to define exact wall boundaries
- A3 layout guide — every island numbered for easy identification
- Acrylic adhesive dots — large and small circles, quantity matched to your map size
Tools required: none. The templates replace the measuring tape. The adhesive dots replace the drill. Everything mounts by hand.
Step-by-Step Installation
1. Prepare the Wall
Choose a smooth wall and wipe it with a dry cloth. Dust is the only thing that weakens the adhesive — on a clean surface, the acrylic dots hold for years. Any indoor wall works: painted surfaces, wallpaper, glass, tiles, textured plaster, concrete.
2. Position the Templates
Place Template 1 at the top-left corner and Template 2 at the top-right corner. Connect the smaller templates between them along the top edge — they fit together precisely and define the exact width of your map. No measuring tape, no calculations. Each map size has its own template set.
For reference, map dimensions:
- XL — 213 × 113 cm
- L — 160 × 85 cm
- M — 120 × 62 cm

Tip: Preview the map on your wall before mounting using Augmented Reality. Open any WOW WOOD product page on your phone and use the AR feature to see the map in your space.
3. Start with the Main Continents
Begin with the top-left corner (Alaska / North America) and the top-right corner (Russia). Work from the top down. From Template 2, attach the upper sections of Russia toward Europe, then add the lower regions — Mongolia, China, Kazakhstan, Saudi Arabia. Do the same for the Americas: top sections first, then work your way down.
Always dry-fit each piece against the wall before applying adhesive. Hold the piece in position and check the alignment with neighboring pieces. Applying adhesive before test-fitting can cause accidental sticking.
About the adhesive: The acrylic dots are industrial-strength — do not use too many. Africa needs about 5–6 large dots. South America needs 3–5. Using more than needed wastes your supply and makes repositioning harder. The interlocking puzzle design provides additional stability.


4. Position Oceania with Template 3
After placing the Americas, Africa, and Eurasia, use Template 3 to accurately position Australia and the islands between Asia and Australia. This template ensures correct spacing across the Pacific.

5. Place Small Islands and Decorative Elements
Use the A3 layout guide to find each island by name or number. The 2 rectangular island panels with pre-arranged small islands mount as single pieces — no need to place each island individually.
Once all land pieces are in place, add the decorative elements: ocean names, compass, planes, and ships.
You can view and download the A3 guide here.

6. Mark Your Travels
Place the 297 wooden pins with country flags on your destinations. Push each pin gently into the birch plywood — they seat naturally into the wood grain. Mark where you have been and where you plan to go next.
Installation time: approximately 90 minutes solo, or about 60 minutes with a partner.
Your WOW WOOD map is complete.
Watch the video of the wooden world map installation
Watch the full installation process from unboxing to placing the last pin. About 90 minutes of work — condensed into a few minutes of video.
FAQs
What surfaces do the adhesive dots work on?
The acrylic adhesive dots work on painted walls (matte, satin, gloss), wallpaper, glass, ceramic tiles, concrete, and textured plaster up to ~4 mm relief. The adhesive is industrial-strength. The only surface that can be unreliable is untreated or lacquered wood paneling. One rule: wipe the wall with a dry cloth before mounting. Dust is the main reason adhesion fails.
Will the map damage my wall?
No. The acrylic adhesive dots are designed for clean removal. To take the map down, gently peel each piece starting from one corner. No holes, no marks, no residue on most surfaces. The map is rental-friendly.
How long does installation take?
Approximately 90 minutes for one person. With a partner — about 60 minutes. The map assembles like a puzzle: position the templates, place continents from the center outward, add islands and decorative details.
How heavy is a WOW WOOD map?
Size M weighs 1.6 kg, Size L weighs 3.1 kg, Size XL weighs 4.5 kg. The weight is distributed across 50+ individual pieces mounted separately, so no single piece puts significant load on the adhesive.
Do I need any tools to install the map?
No. Everything is in the box. The positioning templates define exact wall boundaries for each size — they connect together precisely, so you do not need a measuring tape or pencil. The acrylic adhesive dots attach without any tools. Optional: a step ladder if you want the map higher on the wall.
Can I remove and reinstall the map if I move?
Yes. Peel each piece gently from one corner. The adhesive removes cleanly. Each kit includes extra adhesive dots for reinstallation at your new home.
What if a piece falls off the wall?
The most common cause is dust on the wall surface. Wipe the wall and the back of the piece with a dry cloth. Apply a fresh adhesive dot from the extras included in your kit and press firmly for 15 seconds. On a clean surface, the adhesive holds for years.